Connectivity
The first hurdle is simply how to get connected to the robot. The TonyPi creates its own Wifi that I can connect to with either my computer or phone. With a phone connection you can use the WonderPi app for both iOs and Android and play around with remote controlling the robot, but no deeper interaction is allowed. With a computer connected you can vnc into the raspberry pi os directly and get full root access to everything that is loaded onto it so that is obviously the way to go. I do however need my laptops wifi to access the internet, so instead of connecting to the robot over Wifi I will use an ethernet connection instead.
Now, accessing the ethernet port on the tonyPi is a pain in the ass as you have to unscrew the back-cover of the TonyPi. In addition having a wire sticking out of the side of the robot severly limits the mobility of the robot so I have to find another solution in the long term. Maybe connecting the robot to my own local Wifi network, then accesing it through that network is easier, but then I lose the use of the remote control app. And what do I do if i want to switch back? I might have to initially have the robot create its own network then connect my laptop to it, and have a way to execute a program remotely that reconfigures it to join my local Wifi. Let’s just jot that down on the todo-list and we’ll stick with ethernet for today.
Update: It turns out that you can accomplish exactly what I want if you just read the documentation properly. When downloading all the guides they provide, you get a folder called “Advanced Program Lesson” with lesson 4: “Raspberry Pi Basic Lesson” giving the final answer in lesson 7 “Raspberry Pi WLAN connection. By using the Hiwonder app you can teach the TonyPi the password to your wifi network. This allows the robot to be accesible for VNC over your home network, and the remote control app still works. The Hiwonder app even has a shortcut to view the robots IP address by long pressing so that you can quickly find the correct address for VNC or SSH.
The VNC viewer experience
The HiWonder instructions from their website prepackages a specific version of VNC viewer together with their documentation. I was, and still am, a bit skeptical about installing some unknown SW from a Chinese vendor instead of downloading from a trusted source. I did however scan the executable with windows defender and it didn’t find anything nefarious. I also installed the newest version of VNC viewer from the official website and another free alternative to VNC viewer but none would connect with the TonyPi. It seems that the VNC server installed on the robot itself is a bit outdated and that is the reason it only works with a very specific version of VNC viewer. I guess updating the VNC server software on the TonyPi itself to another free and known version that works well on both Linux and Windows should be another bullet point on the todo-list. Getting the wired connection to properly work was also a bit of a hassle. The wifi connect address is static so I have no problem just saving that one in VNC. But the ethernet address seems to change every time I connect. So to find the right address I first have to connect to the robots wifi network, open vnc viewer and connect over wifi, then open the vnc server remotely and find the correct server address for the wired connection. Finally I can connect VNC viewer over the wired connection and get my laptop connected back to my home network and we are remotely connected to the raspberry Pi desktop. Note the icon for “Language Setting” double click this one to set the OS language to English instead of the default Chinese.

Now, I’m no network expert but I should probably try to make this process a bit more user friendly for myself. Next lets explore what kind of software Hiwonder has loaded onto this thing.
Software applications
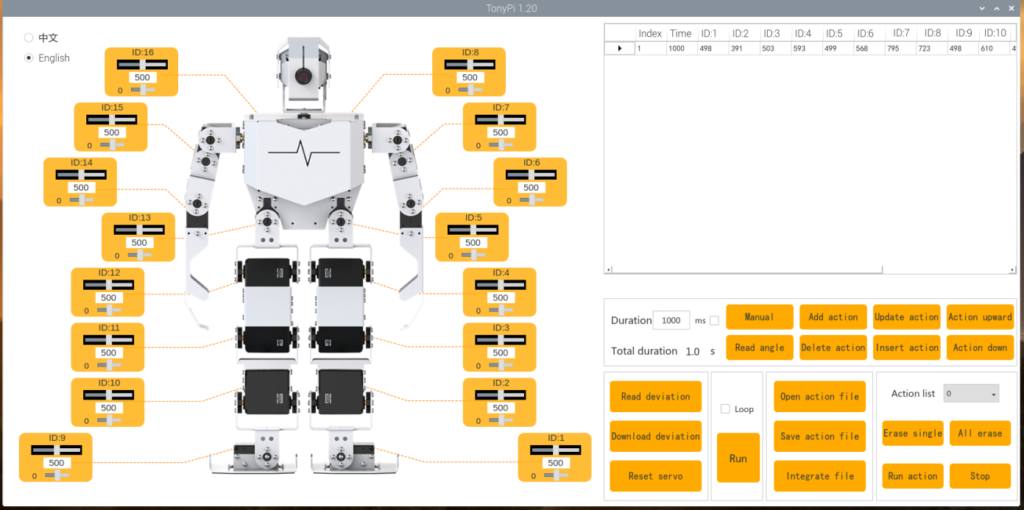
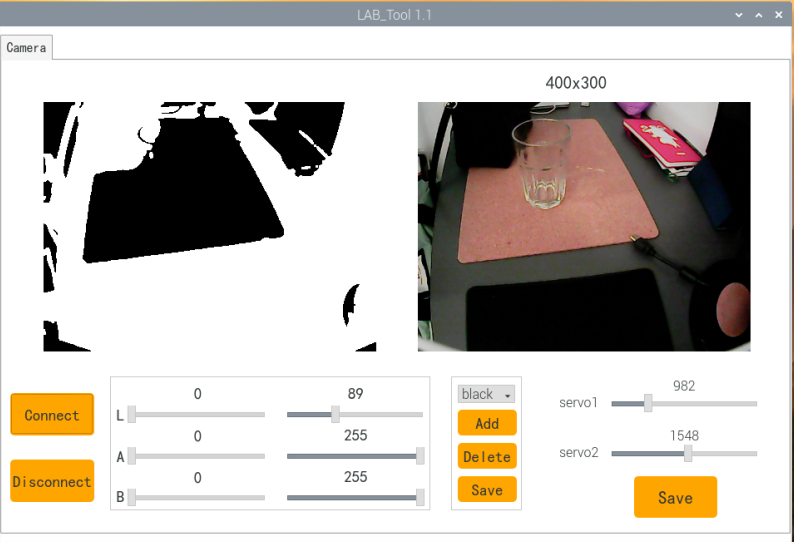
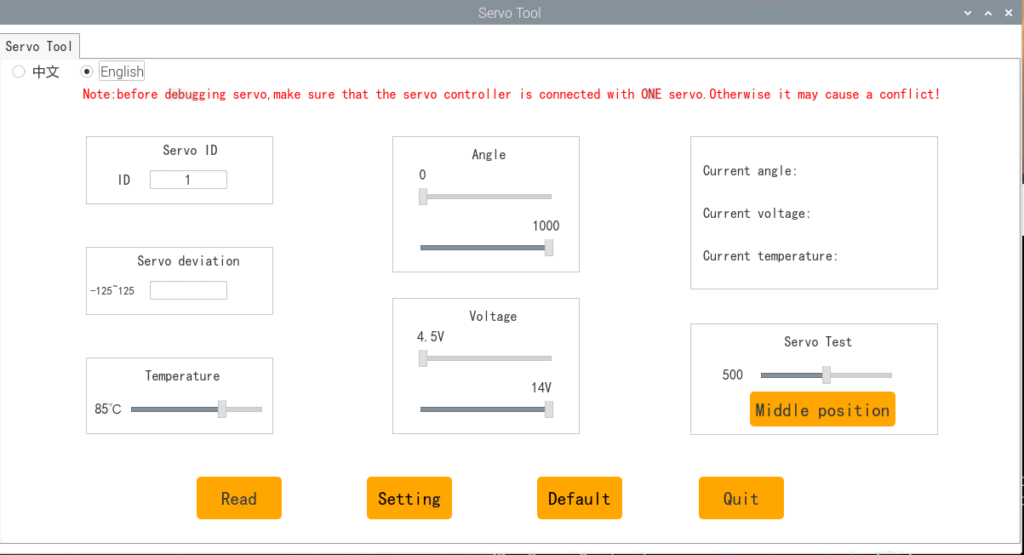
First off, we have the two applications on the desktop. The TonyPi application and the LAB_Tool application. In addition to those two on the desktop there is another one mentioned in their documentation that might be the most interesting one, the Servo Tool. The TonyPi app allows the user to manipulate the 16 bus-servos (not the two in the head) and create custom poses and actions. The Lab tool focuses on the camera and lets the user do color calibration. Finally the servo tool is for debugging and calibrating individual servos. Some screenshots are shown below.
But how does it work?
So the apps are all fine and dandy, but how does all these applications tie together and actually control the servos? Let’s try to apply some logical reasoning and see if we can reverse engineer the Hiwonder SW stack. First, we know that the robot can be remotely operated via the phone app. In the app you can select different mini games that correspond to different functional modes, and you can command the robot to loop different motion sequences to walk. This means that there must be some way to send high-level commands from the phone, to the raspberry pi and something there must forward this to the motor controller board.
Now does the Pi forward the high-level command directly to the controller board and the controller board performs preprogrammed sequences of joint motion, or does the Pi translate the high-level command into joint trajectories? The TonyPi application gives us some hints. The TonyPi application is able to poll the angle of each servo joint directly, and individually control them via a slider. This suggests that the Pi should be able to poll the controller board for a specific servo joint position, and alter the setpoint of the servo.
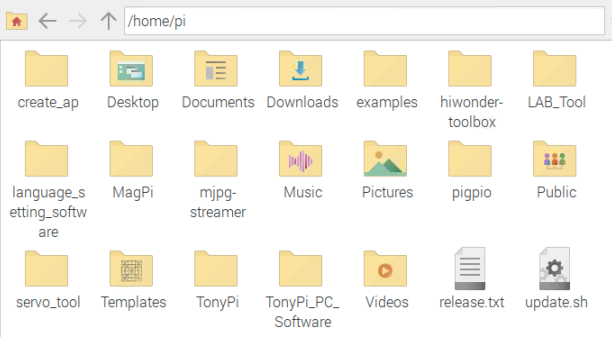
Let’s dig around in the file system of the Pi and take a look at what’s there. A quick summary of what some of the different folders contains is given below:
- hiwonder-toolbox: contains stuff regarding the wifi connectivity and configuration for the pi. More interestingly also contains “hw_remote.py” which seems to recieve and handle the incoming tcp packets from the phone app.
- LAB_Tool: contains the source code for the LAB_Tool application used for controlling the camera
- mjpg-streamer: reading the “readme” in this folder suggests that it is a plugin to capture and clone the video stream so that it can be served to multiple destinations concurrently. Could be fun to play around with in the future, but not of interest now.
- pigpio: I googled it and it seems to be a pretty established library for gpio control of the raspberry pi HW. I should probably do some reading on the pin out of the Pi and see if anything there could be useful in the future.
- servo_tool: contains the source code for the Servo tool application. Most notably there is a python script called “BusServoCmd.py” which when just skimming over seems to establish a serial connection with the motor controller board and implements a protocol for directly controlling the servos.
- TonyPi_PC_Software: this folder contains the source code for the TonyPi application.
- TonyPi: This is where we strike gold. Here we find code for a RPC Server, the main program loop in “TonyPi.py” an SDK, the action group library and the source code for all the mini-games of the robot.
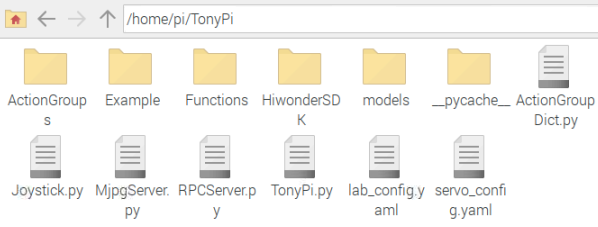
We finally know what the next steps are: keep poking around in the TonyPi directory and get familiar with the SDK, but that will have to be for another post. For now we close with the following summary: all source code seems to be easily available and most of it is written in python (sadly with all comments written in chinese) and communication with the motor controller board seems to be fairly straight forward and open. This should allow us to replace all SW on the raspberry pi with our own custom motion control algorithms, or we can ease into it by using the available SDK.